
How to Adjust 12″ Trailer Brakes (Step-by-Step)
When your trailer brakes feel “weak” after a few months of use, it’s usually because the gap between the brake shoes and the drum has increased due to natural wear. Here is how to restore that stopping power.
For a standard 12″ x 2″ brake setup (Electric or Hydraulic), these are your target numbers:
| Component | Factory/Standard Spec | Wear Trend |
| 12×2″ Brake Shoe Outer Diameter | 304.3 mm | Decreases over time |
| 12″ 6 on 5.5″ Drum Inner Diameter | 305.05 mm | Increases over time |
As these numbers drift apart, the “gap” grows, leading to a delay in braking and a “soft” feel.
Adjustment Steps
1. Disassembly & Inspection
Jack up the trailer safely and secure it with jack stands.
Remove the wheel and the brake drum. * Clean the assembly: Use brake cleaner to remove dust so you can see the components clearly.
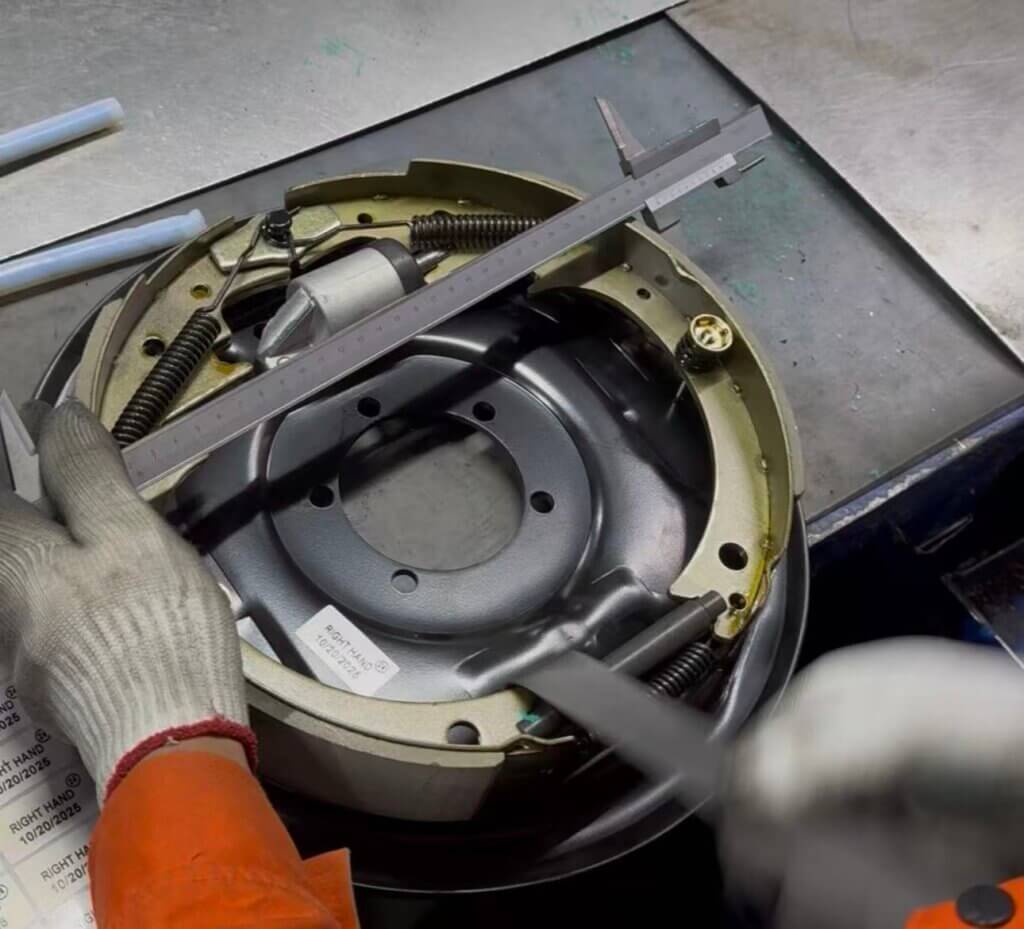
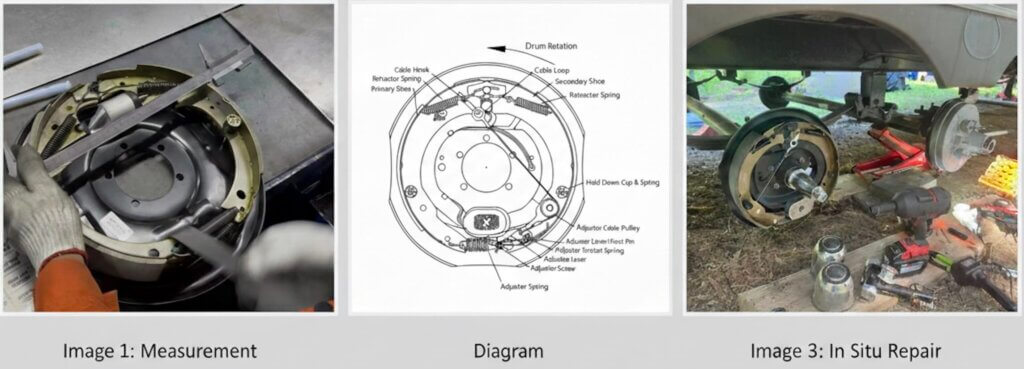
2. Measurement
Use a large caliper to measure the current outer diameter (OD) of the brake shoes.
You will likely find it is significantly less than the original 304.3 mm.
3. Calibrating the Adjuster
Locate the adjuster screw (star wheel) at the bottom of the brake assembly.
Turn the adjuster to expand the shoes outward.
Continue adjusting and measuring until the outer diameter is back to 304.3 mm.
4. Reassembly & Testing
Slide the drum back on. It should be a snug fit but still able to rotate.
Spin the drum by hand; you should hear a very light “scuffing” sound of the shoes touching the drum.
Result: This calibration will typically restore at least 85% of the original braking force.